B.
Setting Up Track Lists Using Podswap
NOTE
Download
Fixmore4
& the track lists zips of your choosing (to include the corresponding pod.ini
files) to your desktop. Extract Fixmore3a and all track list zips to your
MTM 2 directory. The pod.ini zips will be handled one at a
time.
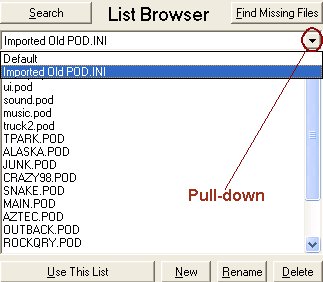
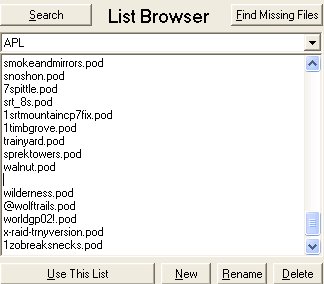
Using the pull-down in the List
Browser area, select the list named Imported Old POD.INI.
Click "Use this list". Now extract one of the pod.ini files to your desktop, then drag and drop
it into the List Browser area. Click "Rename" and create a new name
for your list.
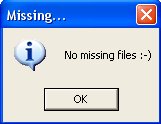
Verify its integrity by clicking
the "Find Missing Files" button.
If everything is intact, the program will give you a No files
missing pop-up. If not, a pop-up detailing exactly which
pod(s) were not found in the directory will be displayed.
Pop-ups of this kind can result from typographical errors, but more often
than not the pod is actually missing from the game's directory.
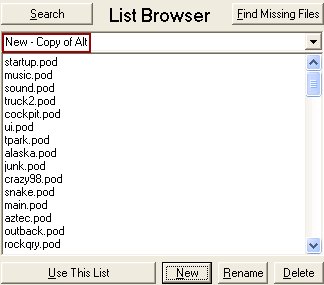
To add additional lists, begin
by clicking "New". In the pull-down list box you'll
see New - Copy of XXXX.
Now extract the pod.ini for the new list to your desktop, drag &
drop it into the List Browser area, then click "Rename", and
name it accordingly. Again, verify that the
list has no missing pods by clicking "Find Missing Files". Repeat
for all remaining track lists.
After all lists have been
installed, select one to play, then click "Use This List",
and you're ready to go. You can leave the PodSwap window open or
close it.
C.
Command Line Swapping - Command
line swapping allows you to swap lists with one (or two) clicks of your mouse
button. It's not necessary to enable this feature since the program
(PODSwap) allows you
to effectively swap lists, but if you're partial to hassle-free list
swapping this is indeed the way to go!
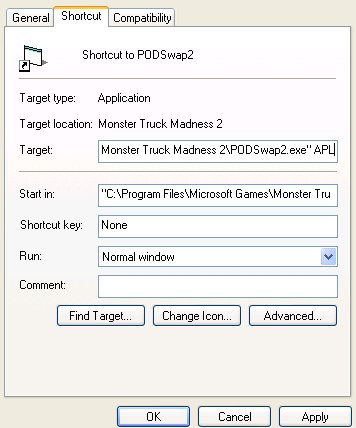
Make
a new shortcut on your desktop using the one that's already
there. Right-click
on the icon and rename the new shortcut to correspond to the list it's intended for
(i.e. Adoob, APL, J-C, etc.)
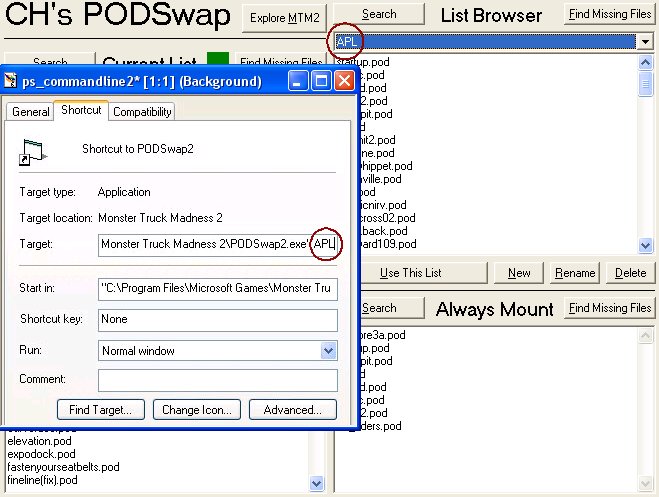
Now right-click on the
newly named icon and select Properties. In the
"Target" box you'll see a command line for that icon.
Click your mouse once in
the target box area to clear the blue highlight. Now place your
cursor at the end the command line, just to the right side of the
quotation mark, press the
spacebar once, then type the name of the track list you want the
command line to point to. Example.
NOTE:
The command line is case sensitive. Be sure
to type the track list name exactly the way you did in PODSwap when
you were setting up the track lists. Example.
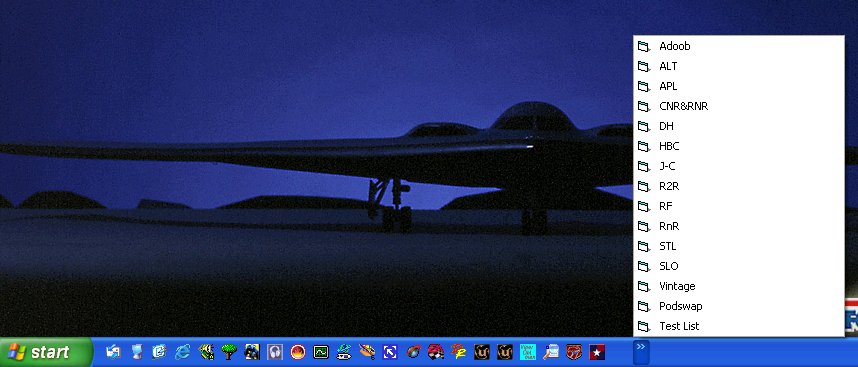
Repeat the
aforementioned steps for the remaining track lists. When done,
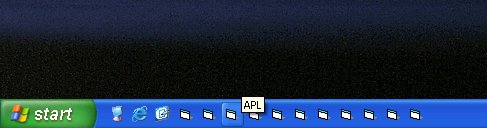
place the icons in a location that allows for quick, easy access,
such as your quick-launch bar like so. Another method that works well is shown
here. For
instructions on how to use toolbars and taskbars, SLO_PaPa has an
easy-to-follow procedure on his site
When placed in the
quick-launch bar, pressing a PODSwap icon once with your mouse
button gives you a List Switched to XXX. The pop-up
merely confirms what list you
selected. The swapping action takes place as soon as you press
the icon, so you can click "OK", "Cancel", or
just leave the pop-up in place.
D.
Adding/Deleting Individual Tracks/Trucks
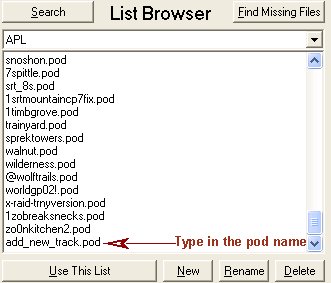
To add individual tracks
or trucks to the game, open PODSwap, locate the list you want to
edit, then press "Use This List".
Now move your cursor to
the last track in that list,
press Enter on your keyboard to create another line, then type in
the name of the pod.
If you want to add multiple tracks, simply press enter after you
complete a pod name to create a new line, then type in the another
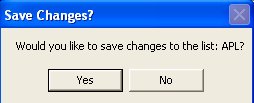
pod name, repeating the process as many times as needed. When done, press "Use
This List", then press "Yes" to complete the step
when prompted to save
or discard
your changes. Close PODSwap.
Alternate method of adding
individual tracks: after selecting the list you wish to edit and
pressing "Use This List", press the "Explore"
button, which opens your MTM 2 directory. Now locate the pod
file you wish to add to the list, then drag and drop it in the List
Browser area. When done, press "Use
This List", then press "Yes" to complete the step
when prompted to save or discard your changes. Close PODSwap.
To remove individual
tracks or trucks from the game, open PODSwap, locate the list you
want to edit, then press "Use This List".
Locate
the track you want to remove, highlight it using your mouse (or
keyboard), then press delete. If deleting a track/truck leaves
a space in the list, close
it by pressing the delete key, then press "Use This
List". Once again you'll be prompted to save or discard
your changes. Press "Yes" to complete the step,
then close PODSwap.


