The
following is a breakdown of each section and its function:
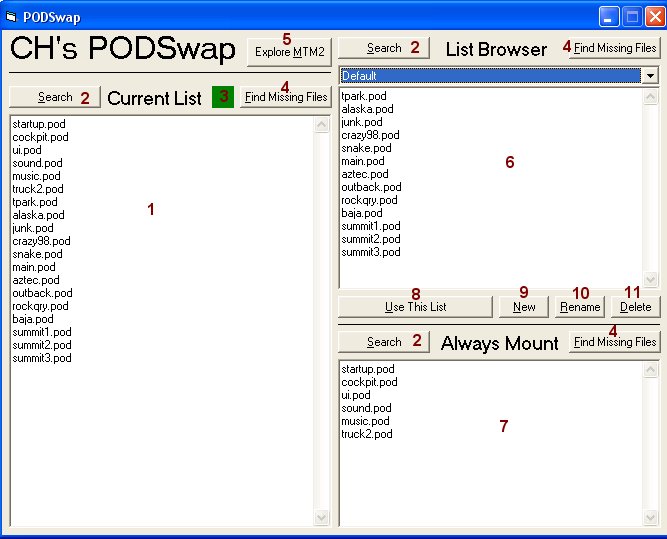
- Current
List (1):
Displays
the list currently mounted to the game.
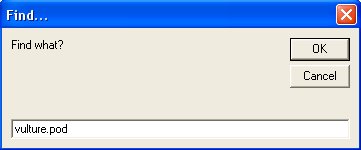
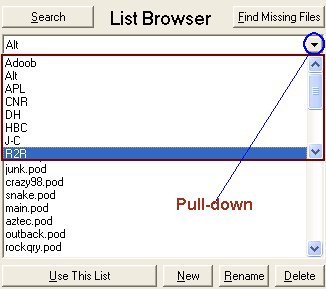
- Search
(2): You can locate a specific
pod in any list by clicking the search button. Type the pod name
(not case sensitive) in the pop-up and click "OK". If Podswap
locates the pod, it highlights it as shown here. If it fails to locate the pod file, it gives you a
"Not found" pop-up.
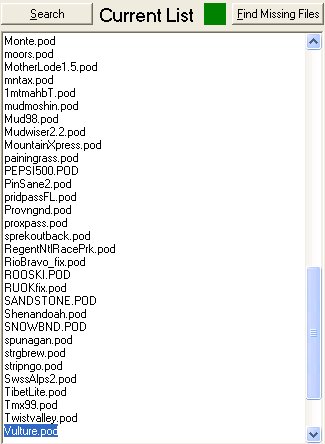
- "All
Systems Go" Indicator (3):
A green light means your game hasn't
exceeded the maximum number of pods (99). If you
inadvertently exceed the maximum number of pods, it changes to red.
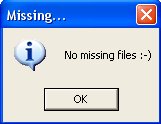
- Find
Missing Files (4):
This
feature allows you to verify the integrity of your lists. You'll
either get a "No Missing Files" pop-up or an
itemized list
of exactly which pods are not available. Bear in mind that if
you add tracks individually by typing them in PODSwap, misspelling a
track name will also yield a missing pod indication.
- Explore
MTM (5): The
Explore MTM 2 button is a direct link to your MTM 2 directory.
It's primary function is to allow the user to add tracks to a list
by dragging & dropping them into the List
Browser as an alternative to typing.
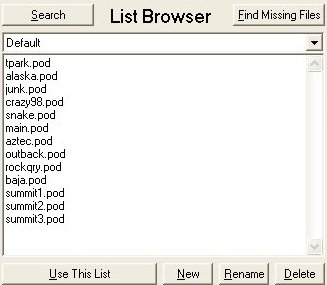
- List
Browser (6):
This area displays the selected list based on what's available in
the pull-down. This
section is used to make changes to specific lists by either typing in the name of the pod or dragging & dropping
it into the open area. You can also drag and drop entire
pod.ini files into this area.
- Always
Mount (7)
Just as the name implies, this section is used for mounting specific tracks/trucks
which will be loaded to the game regardless of what list is
selected. This section is ideal for utilities like Fixmore3a
or merged truck pods.
- Use
This List (8)
After selecting a desired list, pressing this button loads the
tracks for that list to the game.
- New
(9) Used to create new lists.
- Rename
(10) Used to rename lists.
- Delete
(11) Used to delete lists.


